Worm bins are an easy way to help us grow health for our plants and ourselves.
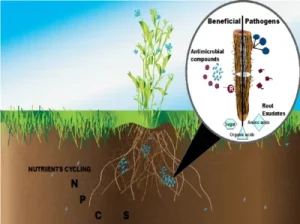
Plants purposefully surround themselves with beneficial microbes to protect against viruses and we can too.
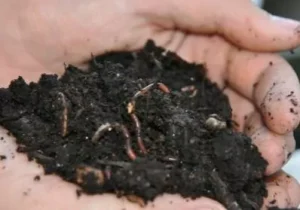
When roots are coated with a protective layer of beneficial microbes, viruses are prevented from harming plants. Contact with healthy soil and compost improves our skin microbiome and immune system as shown by researchers in a 2019 paper titled, “Short‐term direct contact with soil and plant materials leads to an immediate increase in diversity of skin microbiota.”

Beneficial microbes colonize the skin of those who handle compost.
“Soil microbial communities play an important role in plant health and soil quality. Researchers have developed a wide range of methods for studying the structure, diversity, and activity of microbes to better understand soil biology and plant-microbe interactions.“ Source: Culture-Independent Molecular Tools for Soil and Rhizosphere Microbiology, 2013
“Worm bin compost is the best compost I have ever grown. Worm bins are great for growing high quality compost because of their diverse and abundant microbial communities.”
— Russ Henry
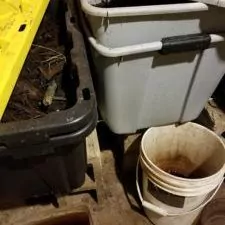
The simple design below has served me well for years.
Microscopic beneficial fungi in healthy garden soil.
Minnehaha Falls Landcaping, Soil Sample
Photo by Russ Henry, Owner
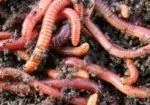
The design and management of your worm bin are critical to your worm’s health and their ability to grow healthy compost. Red wigglers are available online and at garden stores.
Here’s What You’ll Need:
Two matching Rubbermaid type bins
1 lid, 18 gallon or larger.

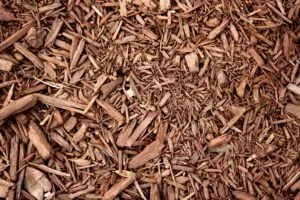
Wood mulch, enough to fill one bin.
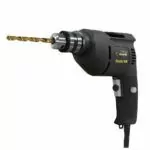
Drill with ¼ inch drill bit.
100 Red Wiggler Worms.
One cup fresh fruit or veggie waste.
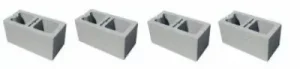
Four cement blocks (or other sturdy shelving).
Here’s What You’ll Do:
- Designate one of your bins as the “inside bin” and one of your bins as the “outside bin”.
- On the INSIDE BIN:
- Drill ~200 holes in sides, bottom, and corners of the bin.
- Concentrate holes toward bottom half of the bin.
- Consistent air flow is essential.
- Fill the inside bin with shredded deciduous wood mulch. If your mulch smells like Christmas, it has too many phytoncides still present in the wood and it needs to sit before it can be used for a worm bin.
- Stack your INSIDE BIN in your OUTSIDE BIN, place on a short shelf made out of cement blocks or other sturdy material.
- I keep my bin in my unfinished basement.
- The brighter and warmer your bin storage space is, the more you’ll need to monitor moisture levels.
- Fill with water. Soak the wood mulch in your bin for 24 hours.
- Drill 1 drain-hole in the OUTSIDE BIN, in a bottom corner.
- Set a bucket under the hole, and allow water to drain out.
- Tilt and prop up the bin slightly on shelf to direct all water to drain.
- Place approximately 1 cup of fruit or veggie waste such in the bin under the top layer of wood mulch.
- Only feed 1 cup of food at first because that should last the worms about 3 days.
- NEVER ADD citrus of any kind to your worm bin. Citrus has a terpene that kills worms.
- Also avoid meat, feces, beans, and oils because they will cause flies to colonize your bin.
- Add the worms. A package of 100 worms will be able to colonize a well-managed worm bin in short order.
- Check on the worm’s food every 3 days.
- If most of the food is gone, go ahead and add another cup of food waste.
- If they start eating all the food before 3 days-time, increase the amount of food you provide ½ cup.
- Check on the bin’s moisture every 3 days.
- Worms thrive between 50 and 70% moisture.
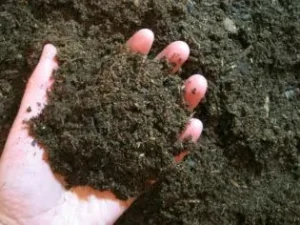
- How can you tell if your moisture is correct? When you lightly squeeze a handful of your worm bin wood mulch it should drip 1-3 drops of water.
- This old farmer’s strategy can help approximate soil moisture levels without an expensive moisture meter.
- Keep a loose-fitting lid on the bin to slow moisture loss and prevent light from reaching the compost.
Now that you have a worm bin…what can you do with it?
Harvest
Let your worms move and eat their way through a bin for about a year.
Prior to harvest, migrate your worms from the bin you’re ready to harvest, into a new bin.
To migrate worms, first set up a second worm bin with 2 new Rubbermaid style tubs as described above.
This time after you introduce the first foods into the new bin, place the inside bin of the harvestable compost directly on top of the mulch in the new bin.
Worms will squeeze through holes in the bin to find their way to the food in the new bin.
Let your old bin sit atop your new bin for a day or two as all the worms migrate.
Once the worms have mostly migrated out of your compost, you can harvest and utilize your compost.
Compost is best when used soon after harvest.
Health Benefits
While you are handling your worms and compost, you will be coming into contact with healthy, aerobic microbes that can help support your immune system.
I personally handle worm compost on a daily basis and I haven’t had the flu since I started managing worm compost.
How we can help…
Now that you are ready to grow healthy worms, soil & microbes – let us know how it goes! Contact us anytime for a worm bin or DIY low impact gardening consultation.